
If you’re a fan of metal brain teasers, the Hanayama Keyhole puzzle is one that likely caught your attention. Designed by puzzle master Akio Yamamoto and manufactured by Hanayama of Japan, this sleek and mysterious puzzle is both elegant and mind-bending. In this article, we’ll walk you through everything you need to know to tackle the Hanayama Keyhole brain teaser puzzle, including helpful tips, the solution process, and why it’s a favorite among puzzlers.
What Is the Hanayama Keyhole Puzzle?
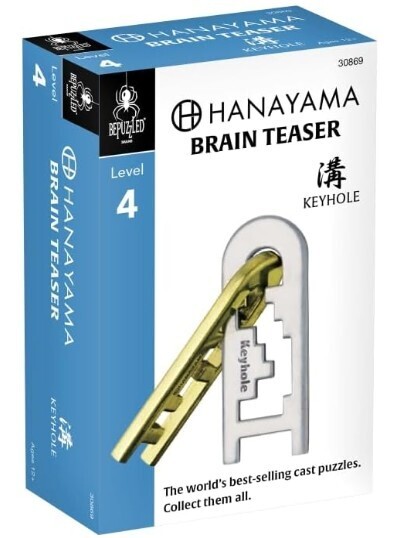
The Hanayama Keyhole puzzle is part of the popular Hanayama Cast Puzzle series, known for their beautifully crafted metal puzzles. This one is rated a Level 4 on Hanayama’s difficulty scale (1 = easy, 6 = hardest), which makes it a moderately difficult challenge—especially for those new to mechanical puzzles.
The goal? Separate the two metal pieces and then reassemble them. The pieces are shaped like old-fashioned keyholes, with several tricky curves and traps that will keep your fingers and mind busy.
Why the Keyhole Puzzle Stands Out
There are several reasons this puzzle has become a fan favorite:
- Satisfying weight and build quality typical of all Hanayama puzzles
- A unique solving experience with deceptive simplicity
- Great size for portability, making it perfect for on-the-go brain workouts
- It’s an ideal brain teaser for adults who enjoy spatial reasoning and critical thinking
Whether you’re solving for fun, improving cognitive skills, or adding to your puzzle collection, the Keyhole is a great mid-level challenge.
How to Solve the Hanayama Keyhole Puzzle
⚠️ Spoiler Alert: The section below provides a walkthrough of the puzzle solution. If you want to solve it on your own first, stop reading here!
Let’s break down the Hanayama Keyhole puzzle solution step by step:
Step 1: Identify the Sides
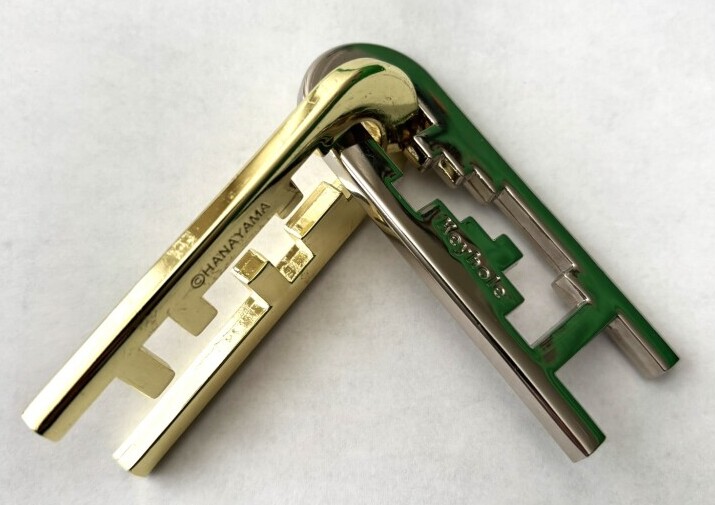
There are two pieces to the puzzle. One piece is gold colored and has the word Hanayama engraved on it and the other piece is silver colored with the word Keyhole engraved on it.
Step 2: Initial Alignment
Hold the gold piece in your left hand with the word Hanayama facing up and the silver piece parallel to the gold piece in your right hand with the word Keyhole facing away from you.

Step 3: Rotate and Shift
A. Move the silver piece to place the first small notch into the first small notch of the gold piece, as follows:
- Rotate the silver piece upward 90 degrees.
- Rotate the silver piece 90 degrees counterclockwise around to the back of the gold piece AND engage the two small first notches in both pieces.


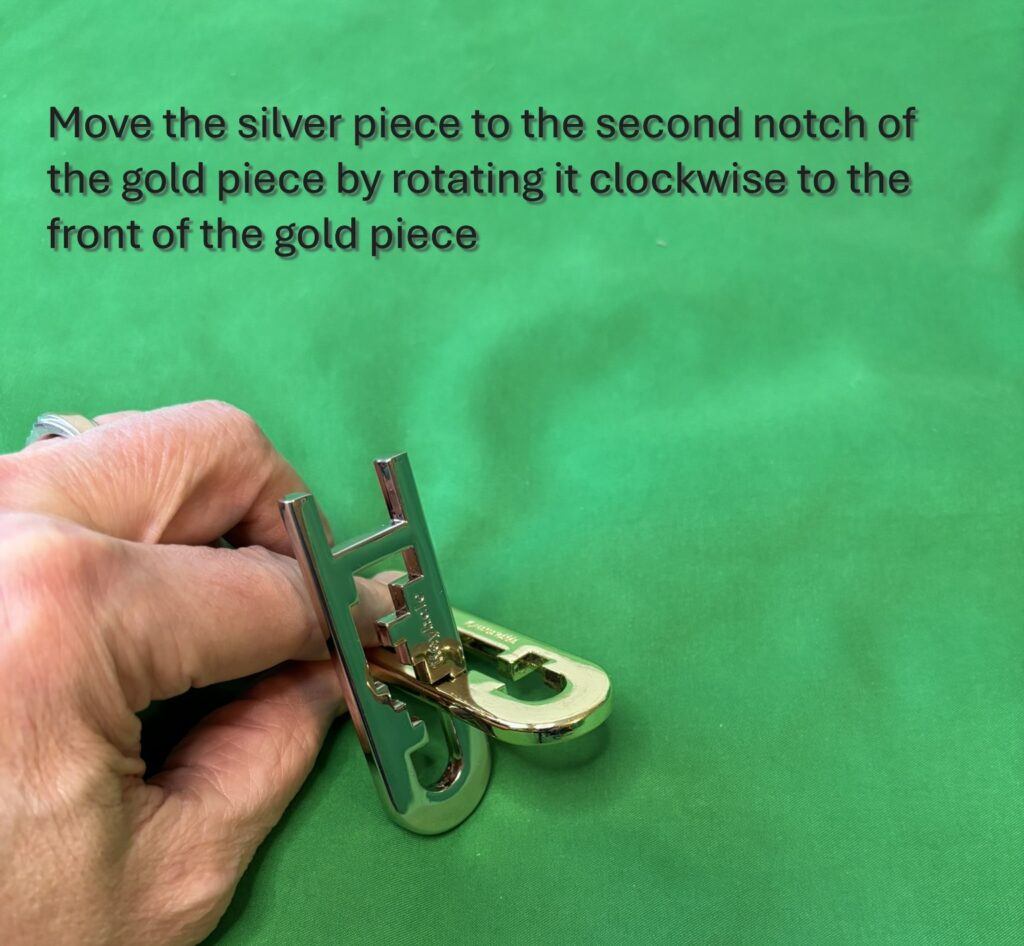
B. Move the silver piece to the second notch of the gold piece by rotating it clockwise to the front of the gold piece. This places the first notch of the silver piece into the second notch of the gold piece.
C. Move the silver piece to near its bottom within the second notch of the gold piece, as follows:
- Disengage from the second notch of the gold piece AND lift the silver piece all the way up to where the curved inside of the silver piece hits the bottom of the gold piece.
- Rotate the silver piece toward you 180 degrees. The two feet of the silver piece will be facing down at this point.
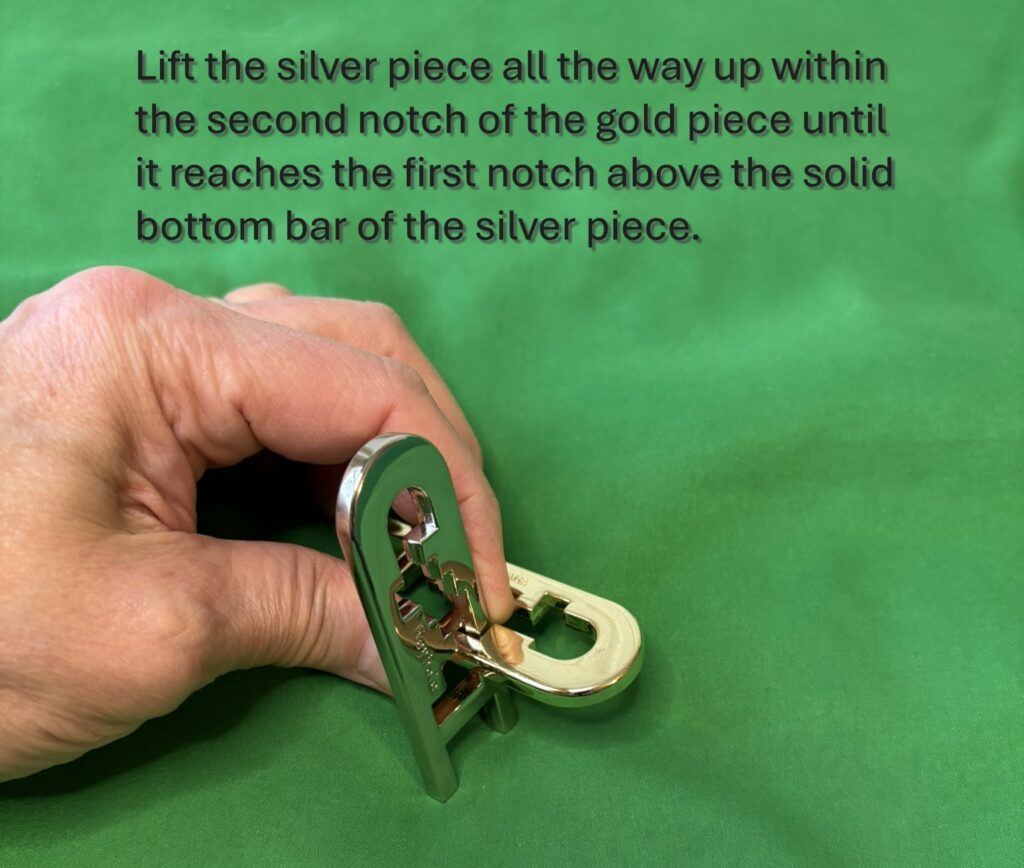
- Lift the silver piece all the way up within the second notch of the gold piece until it reaches the first notch above the solid bottom bar of the silver piece.


D. Move the silver piece to the last notch near the exit of the gold piece, as follows:
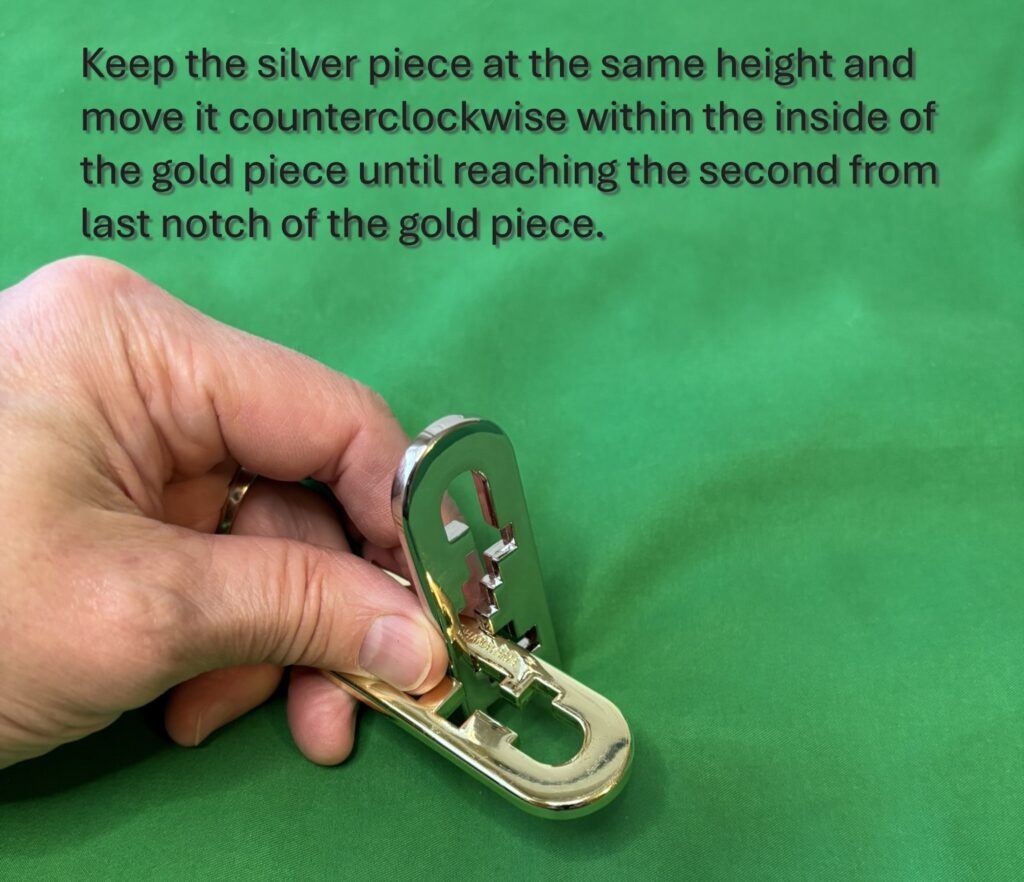
- Keep the silver piece at the same height and move it counterclockwise within the inside of the gold piece until reaching the second from last notch of the gold piece.
- Lift the silver piece up slightly to get it around the second tab of the gold piece and into the first notch of the gold piece.

E. Complete the puzzle, as follows:
- Move the silver piece all the way down until inside of its curved end reaches the top of the gold piece.
- Rotate the silver piece up toward you 180 degrees. The feet of the silver piece will be pointing upward at this point.
- Lower the silver piece all the way down to touch its bottom bar to the top of the gold piece.
- Move the silver piece clockwise around the gold piece until it reaches the exit point on the gold piece.


Reassembly
- Start with the gold piece parallel to the floor, opening to the left and the Hanayama word facing upward.
- Start with the silver piece legs facing upward, the word Keyhole to the right.
- Insert the open end of the gold piece into the portion of the silver piece just above its bottom solid bar.
- Reverse the order of remaining disassembly steps to restore the puzzle to its starting point.
Solving Tips for Beginners
- Be patient – These puzzles reward a calm, methodical approach
- Use gentle pressure only – Forcing the pieces can damage the puzzle
- Work in good lighting – Some details are subtle and easy to miss
- Take breaks if needed – Giving your brain a rest can lead to breakthroughs
Is the Hanayama Keyhole Puzzle Worth It?
Absolutely! For anyone who enjoys Hanayama puzzles or brain teasers for adults, this puzzle offers just the right amount of difficulty and delight. It also makes a fantastic gift for puzzle lovers or a conversation-starting coffee table piece.
Final Thoughts
The Hanayama Keyhole is a deceptively tricky puzzle that delivers a highly rewarding solve. Whether you’re collecting Hanayama’s intricate creations or diving into your first metal brain teaser puzzle, mastering the Keyhole is a satisfying achievement.
For a review of other Hanayama Brain Teasers, check out our article Hanayama Brain Teaser Puzzles.
Follow us on Facebook, Instagram, YouTube and Pinterest for more articles, tips, tricks and giveaways!
PuzzleSolverPro is reader-supported. When you buy via links on our site, we may earn an affiliate commission at no extra cost to you. It’s a simple way you can support our mission to bring you quality content.